The squat is a pretty simple and fundamental movement with dozens of different iterations, but the basic technique can form the foundation for a really safe, effective and productive workout. So we present our five secrets to upgrade your squat (an updated version, four years on from our original article because the evidence has improved so we need to change!).
But first, why squats…
The squat is a fundamental pattern that forms the foundation of normal human movement and athletic development. There aren’t many high-intensity interval training (HIIT) sessions that don’t target the squats in one way or another. And the squat targets big muscle groups (quads, glutes, hamstrings and low back) so it has a huge metabolic effect.
Squats might be as simple as body weight, as complex as an overhead squat or anything in between like goblets, front squats, back squats or even box jumps. If you can get your technique sound and in a way that works for your body, then you are a long way towards making your workouts as healthy and effective as possible.
The squat is how toddlers bend down to play with toys and explore the world, it’s how parents bend down to pick up after their toddlers and it’s how a grandparent will get in and out of a chair later in life. It is an innate movement pattern, and one that should be carried out regularly. For this reason, learning to squat correctly is an investment that will pay long term dividends.
1. Build your squat from the ground up
To squat, let’s get your feet about shoulder width apart. Imagine a tripod under your foot (heel, knuckle of the fifth toe, knuckle of the first toe) and try to distribute your weight evenly amongst all three of these points. Take a moment to notice where your weight sits and adjust it accordingly.
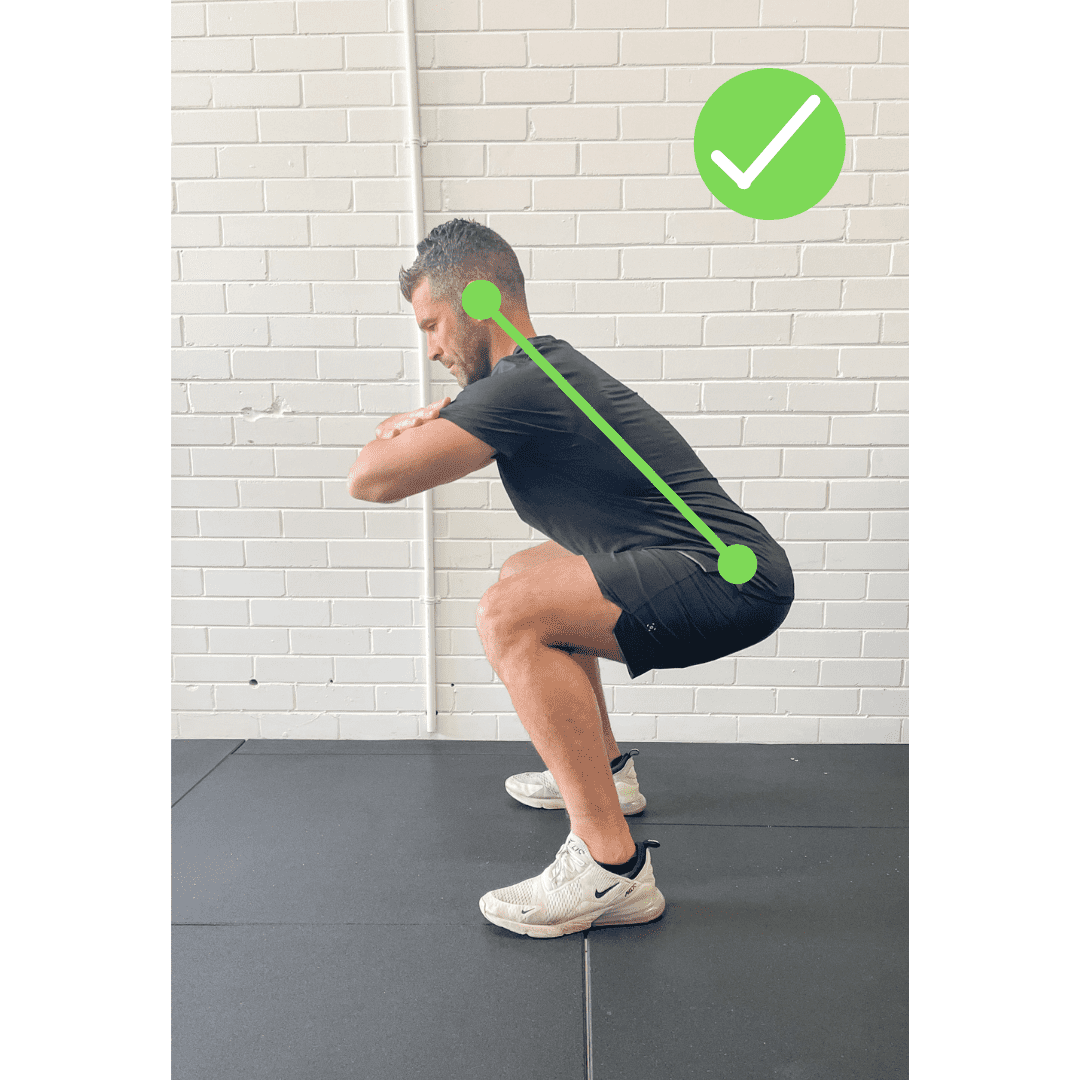
Now, look to balance your body in an upright position by lining up your lateral ankle, your hip bone and the point of the shoulder.
2. Keep your low back neutral
This tip is the most important one in injury prevention. Your low back should remain pretty close to neutral for the whole squat from start to finish. This means you should have keep normal, natural curve.
As you lower down into the movement, try not to exaggerate this arch and flare your ribs out at the front. Once you get to the bottom of the movement, keep that arch, pause for a fraction of a second and come back up.
Try to avoid a buttwink (see the picture) which is when your low back slumps at the bottom of the movement puts a lot of pressure on some key structures in the spine. Check out our post on tips to avoid a buttwink here.


If you can’t control your low back the whole way through a squat yet, you are better off just doing a partial range version of the movement. Going deeper doesn’t always mean a better squat. You’re so much better off to do a well-controlled, half or three-quarter range squat than a poorly controlled deep squat.
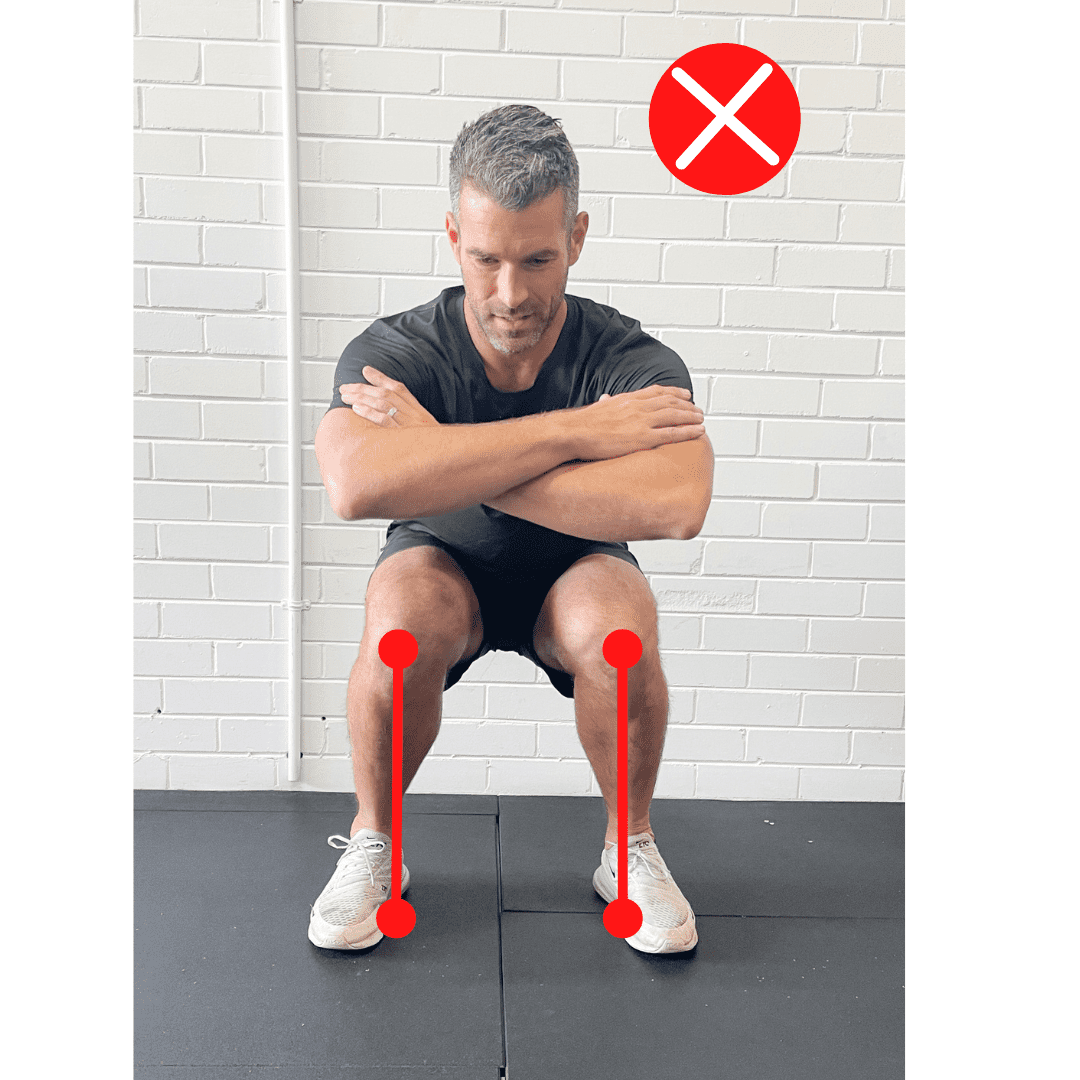
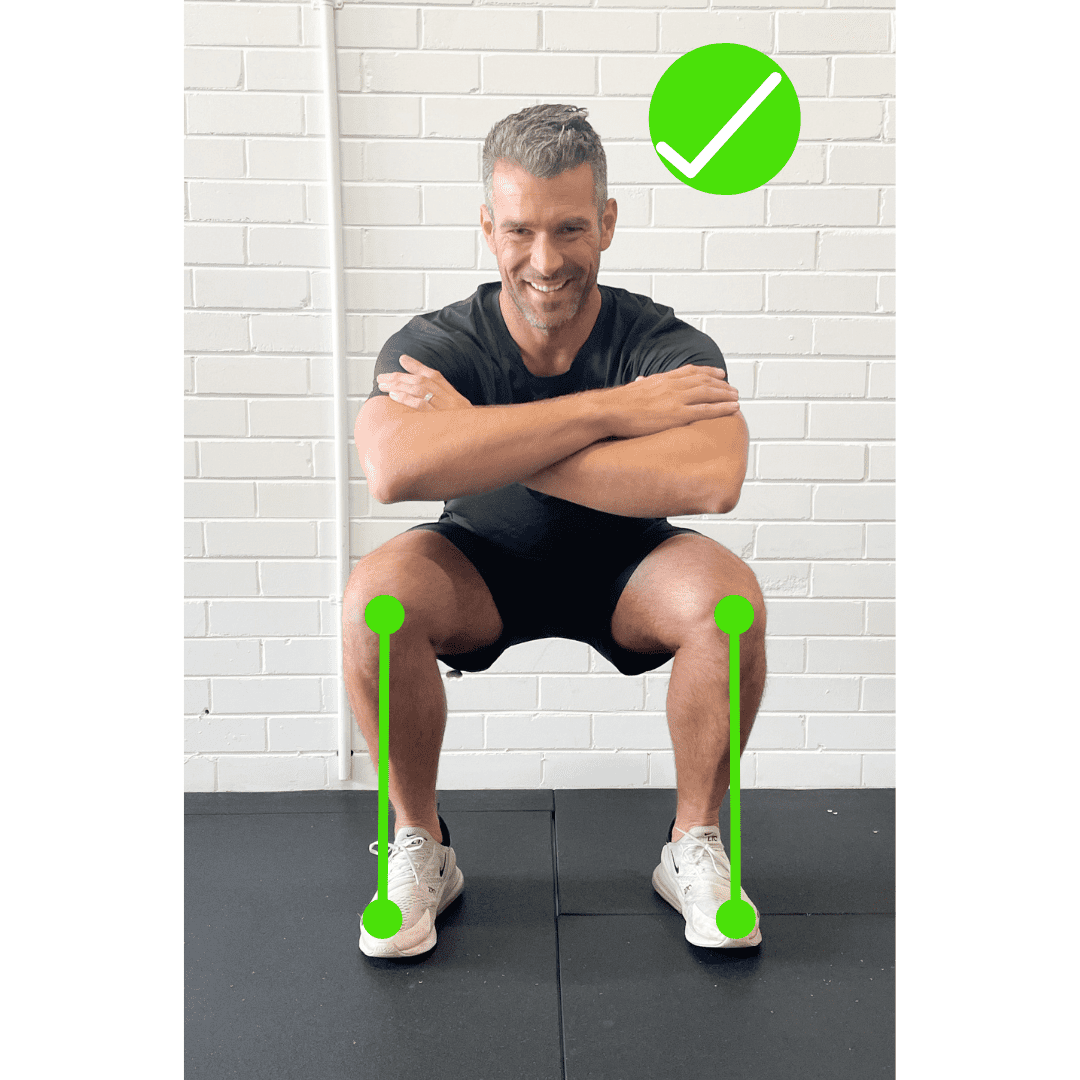
3. Knee position – keep some width!
Aim to keep your knees inline with your fourth and fifth toes as you lower down into the squat position. If your knees roll into the midline, you can put excessive stress on the joints, in particular the joint behind the knee caps which can cause pain and become really limiting as you try to train. If you think this might be you, try to gently push the outsides of your knees to the walls on either side of you.
Remember, sometimes you just need to reduce squat depth to keep within a range of motion that you can control and that is absolutely fine – you’ll definitely improve if you don’t push things too far in the early days.
Following this tip should help to keep your back, knees and hips in great health as you pursue those fitness goals.
4. Knees over toes is OK!
While we used to believe that your knees should never go forward over your toes, we’re now realising that to squat deeper, this is necessary. Without being excessive, allow the knees to move forward past that imaginary vertical line that comes up from your toes. Doing this will help you to keep your torso a bit more upright (not that this is the goal of a squat) and will also allow you to sink your hips and butt down to the ground.
This said, if it causes knee pain, then maybe a hip dominant squat is for you! We have another blog on squatting with knee pain coming soon!
5. Get your eye line right
Aim to keep your eye line directly perpendicular to your body when you squat. This means that you start the movement looking straight ahead and bring your eye line down to a point on the ground a few metres ahead of you once you’re at the bottom of the movement. As you return to the start position, your eye line comes back up to eye level on the wall in front of you.
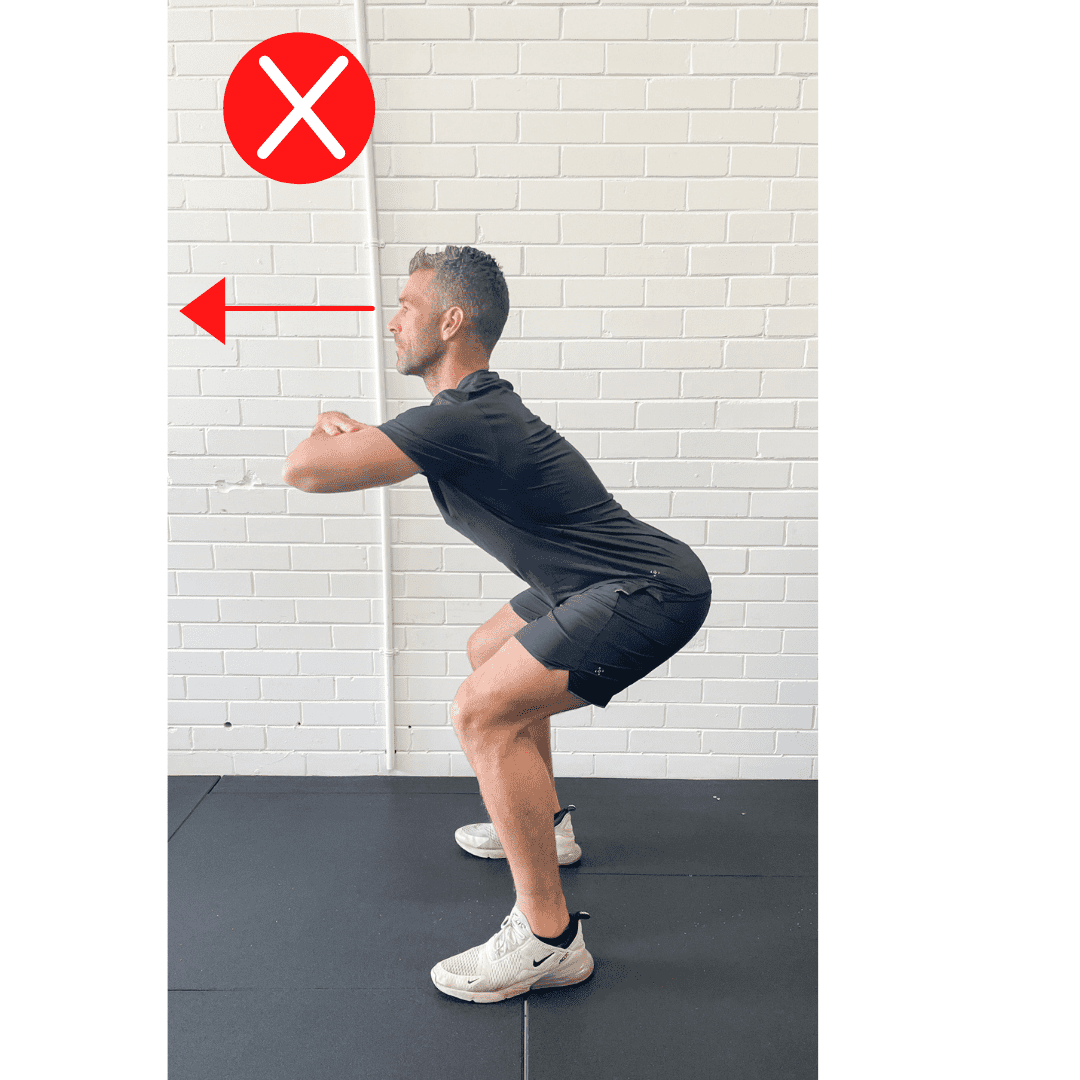
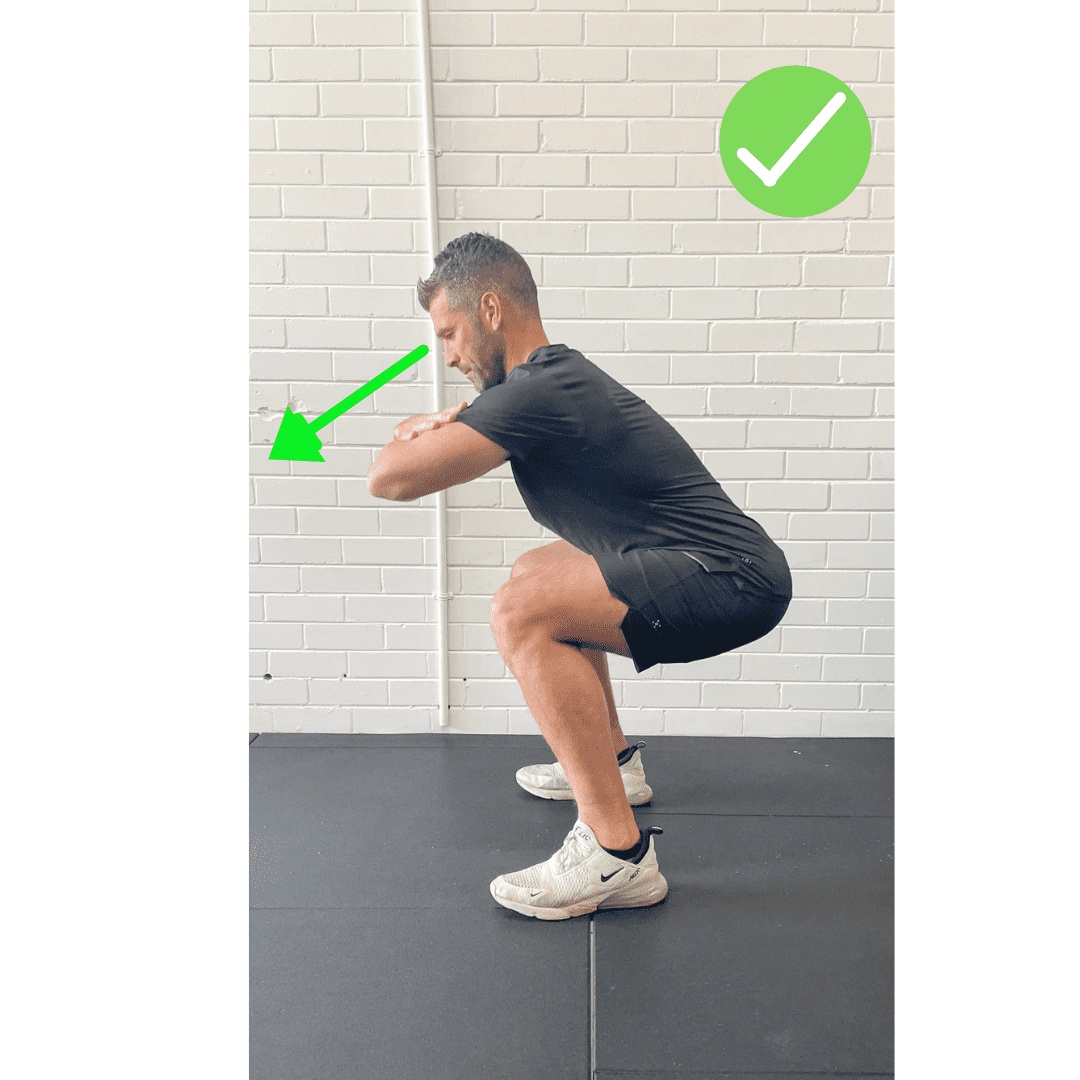
This will protect your neck and round out your perfect squat!
Good luck with your training!
Book now with a physio that can help you fine tune your squat!